Posts
Undoubtedly the most important part of Anchor, the posts interface lets you add, remove, and edit any blog posts (or articles) in your Anchor blog.
The posts screen
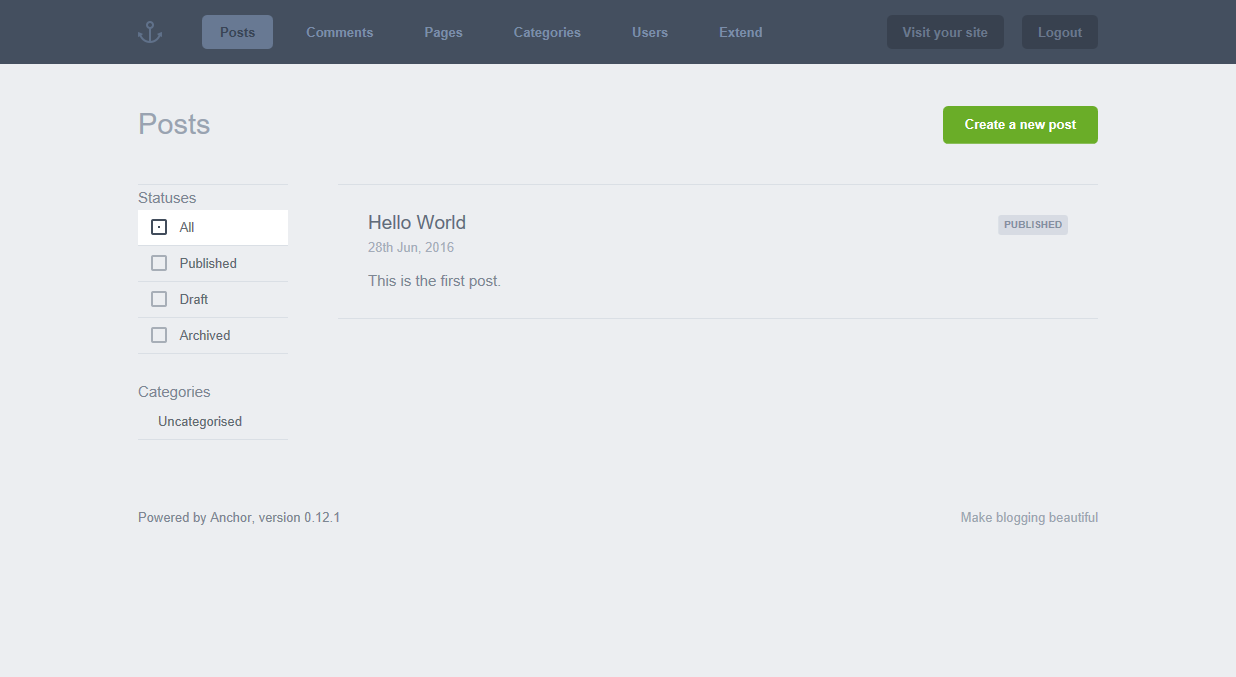 This screen will show you all of your posts, coloured by status.
Creating/editing a post
To create a post, click the green “Create a new post” button. You’ll be greeted with a minimal writing interface (see below).
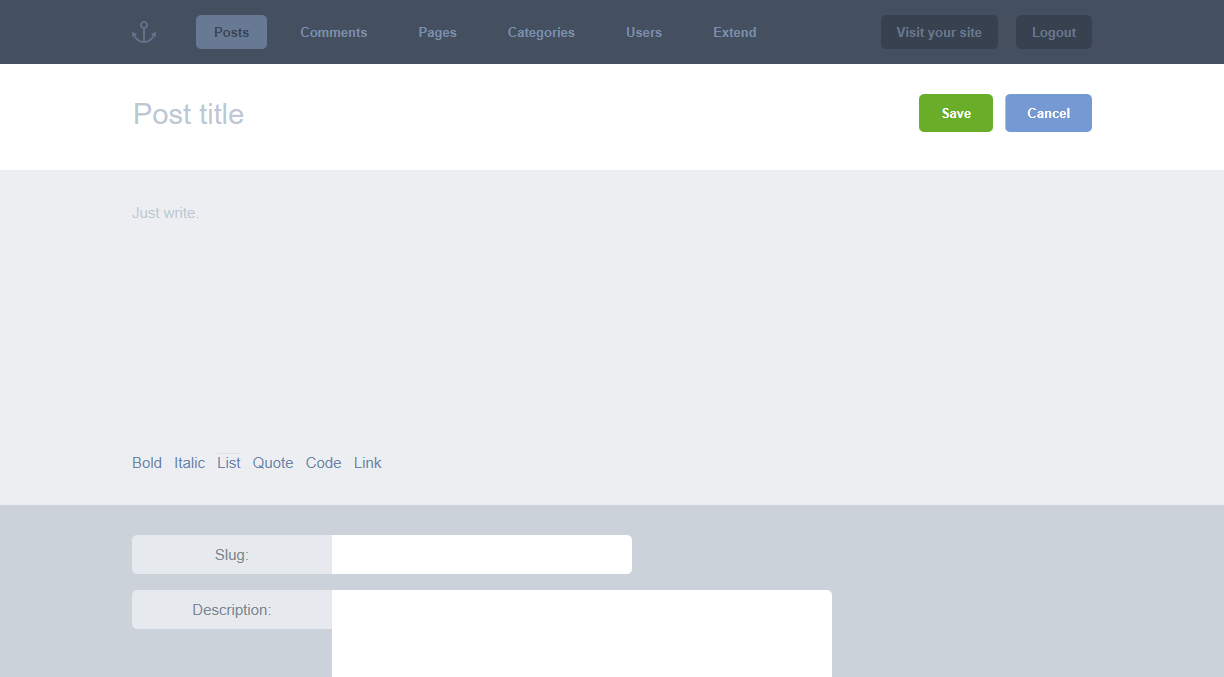
The extra fields (excluding custom fields) are explained below.
Slug
The unique identifier and section of your blog’s URL that tells you about the post. Useful for SEO and usability (or “guessability”).
http://mydomain.com/blog/my-article-slug-example
Description
This is a short summary of your article which you can use in listing pages.
Status
By default, a post can have three statuses attached to it:
- Published — publicly viewable and searchable.
- Draft — private. Not viewable or searchable on your site. You do not need to complete all required fields to save a draft article.
- Archived — semi-private. Not searchable, but visible via direct URL (i.e guessing the slug).
Category (optional)
The category the content should be filed under.
Allow Comments (optional)
Choose whether or not to display the comment form (and comments) with the post. This includes all prior comments
Custom CSS (optional)
Each article can have its own style, you can populate this with CSS code by typing it in the input textarea, or if you already have your styles in a CSS file, you can drag and drop anywhere on the create post page to populate it.
Custom JS (optional)
Each article also can have its own JavaScript, you can enter it typing it in the input textarea or if you already a JavaScript file you can drag and drop anywhere on the create post page to populate it.
Custom Fields (optional)
Your Custom Fields; you should know what these are, you created them!